You will be surprised to know that more than 80% of the servers run on the Linux OS. It is the most preferred operating system adopted by large enterprises due to its flexibility and giant open-source codebase.
Unlike Windows and macOS; Linux is open-source which means it is continuously developed collaboratively by thousands of developers around the world. Whether you like it or not; you just cannot skip Linux commands if you are serious about learning cloud computing. But don’t worry I had to go through the same trouble when I first started using Linux, therefore, I’ll try my best to keep things simple so that even an ordinary Joe can get up and running with Linux commands.
I could have wrapped up everything in just one long article instead of breaking it into three parts series but then it would be difficult for you to digest. I really want you to apply what you learn here.
If you want to learn more about Linux refer to its official documentation or read about the best Linux distributions.
Alrighty! Let’s get started.
Table of Contents
- Why Ubuntu?
- Installing Ubuntu as Standalone OS
- For Windows
- For macOS
- Installing Ubuntu Alongside another OS
- Installing Ubuntu Using a Virtual Machine
- Play with Ubuntu using Live CD/USB (BONUS)
- Online Ubuntu Terminal (BONUS)
- Exercise
How to Install Linux?
Linux is an operating system and it should be treated as such. What I meant is; the best way to use Linux is to install in on your machine either alongside your existing operating system or as a standalone operating system.
But since you are just starting out and I don’t want to be the blocker here, therefore, I’ll also throw bonus methods of using Linux OS without actually installing it on your machine!
Why Ubuntu?
Ubuntu is one of the many Linux distributions which is very secure and easy to use as compared to Debian. It is one of the favorite distribution of desktop users and provides a friendly operating system suitable for the average computer user.
Let’s look at some of the key features of Ubuntu.
- Ubuntu is an open-source project.
- Ubuntu supports a variety of software.
- It is flexible to work as a core, server, and desktop OS.
- Highly robust and secure Linux distribution.
- Supported and maintained by a very large community.
In this series and also in the future tutorials on Cloud Computing, I will be using Ubuntu distribution.
Method 1: Installing Ubuntu as Standalone OS
In this method, we are replacing our existing operating system with Ubuntu.
For Windows
Step 1: Take a Backup
If you are a PC user and want to replace your existing Windows OS with Linux OS then the first thing you need to do is to take a complete backup for your files. You may either take a full back-up on another drive inside your machine or on an external hard drive. I recommend the latter option.
Step 2: Create a Bootable USB for Ubuntu
In order to boot directly from the USB, we need to create a bootable USB for Ubuntu OS. For that simply download Ubuntu ISO image which is around 2GB of size.
Restart the computer with the USB plugged in and choose the option ‘Replace Windows X with Ubuntu’
This will remove all the data from your computer and start installing the Ubuntu OS as a standalone operating system. Next, follow along the installation process, choose your location and desired language and once the installation is completed, reboot the machine.
For macOS
Installing Ubuntu as a standalone operating system inside a Mac machine is not straightforward. It means getting rid of Mac OS as well as OS recovery partition which makes it difficult to revert to the original macOS.
If you are really into switching the OS then follow along. Below are the steps you need to take for replacing the existing macOS with Ubuntu.
Step 1: Download the Ubuntu ISO file from the official Ubuntu website.
Step 2: Download Etcher application that is used to copy the Linux ISO to a USB.
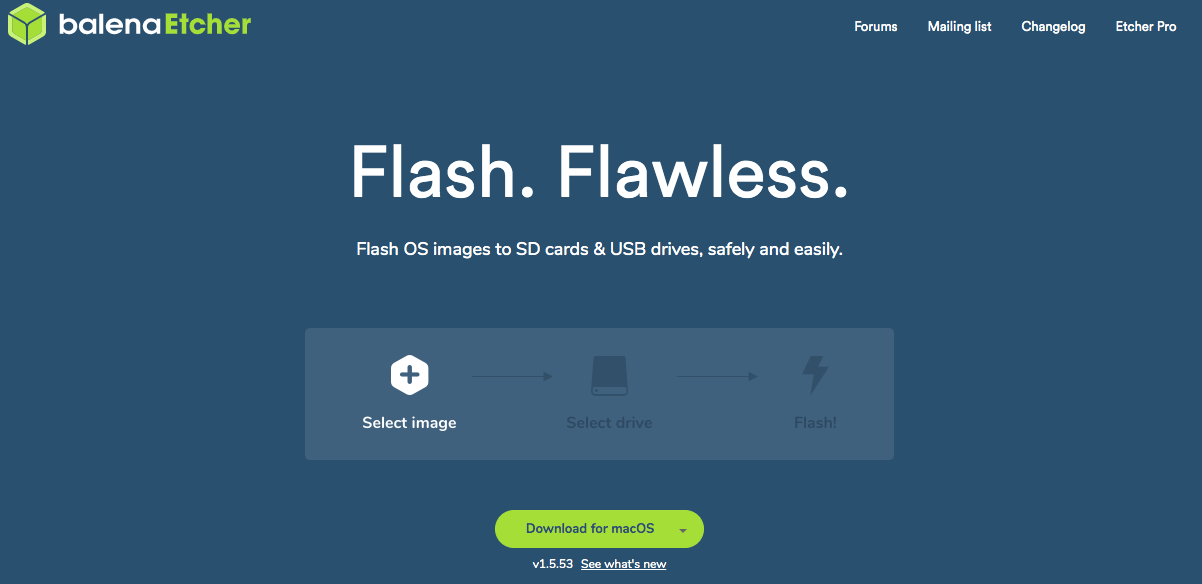
From the settings, check ‘Unsafe Mode’ and click ‘Continue’. Now, click ‘Select Image’ and choose the Ubuntu ISO image. Insert your USB thumb drive and click ‘Change’ under select drive.
Note: Make sure to select /dev/disk1 if you have a single hard drive in your Mac. Do not choose /dev/disk0 as this is your Mac’s hard drive.
Finally, click on ‘Flash’ and wait for the ISO to get copied on your USB thumb drive.
Step 3: Shutdown the machine and insert the USB drive. Reboot it while holding down the ‘Option’ key. Choose the EFI boot option and hit enter.
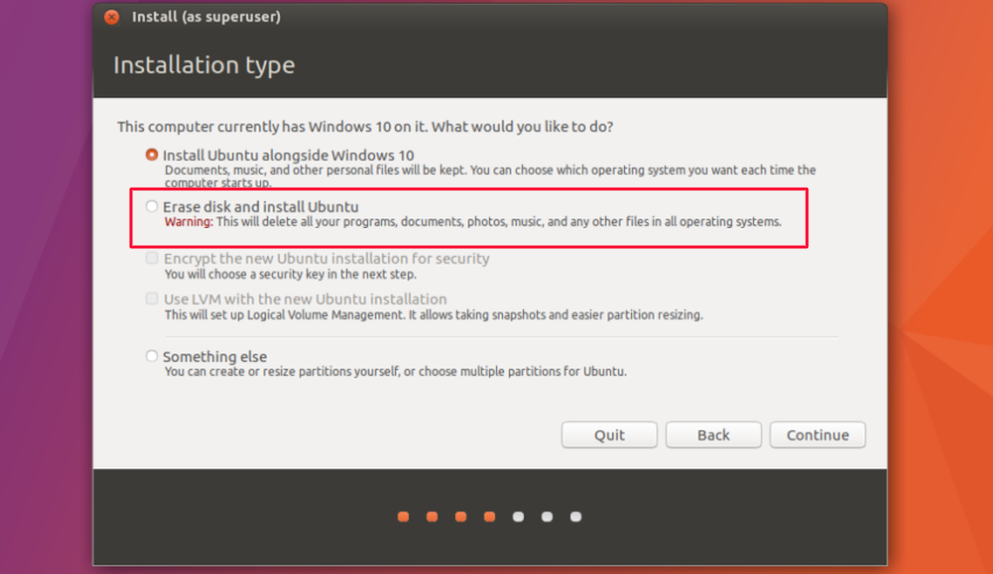
This should begin the usual installation process of Ubuntu. However, make sure to choose the right option at the start which in our case is ‘Erase disk and install Ubuntu’
Method 2: Installing Ubuntu Alongside another OS
If you wish to keep your existing operating system (Windows or macOS) and still want to use Linux operating system then this method is for you. Whether you have a PC or Mac, Ubuntu can be installed alongside your existing operating system.
Let’s see how to run Ubuntu alongside another operating system.
Note: Running multiple operating systems on a single machine requires more resources. It is recommended to analyze your system specifications prior to installing another OS.
Step 1: In the first step take a backup in case things go south. Similarly, create a bootable USB with Ubuntu ISO image loaded.
Step 2: In this step, we need to create a partition where we wish to install the Ubuntu operating system. Assuming that you have the windows installed on your C drive, we can utilize the other partition (if any) to install Ubuntu or we can also create a new partition inside our hard.
To create a partition, head over to the Disk Management tool inside your Windows 10.
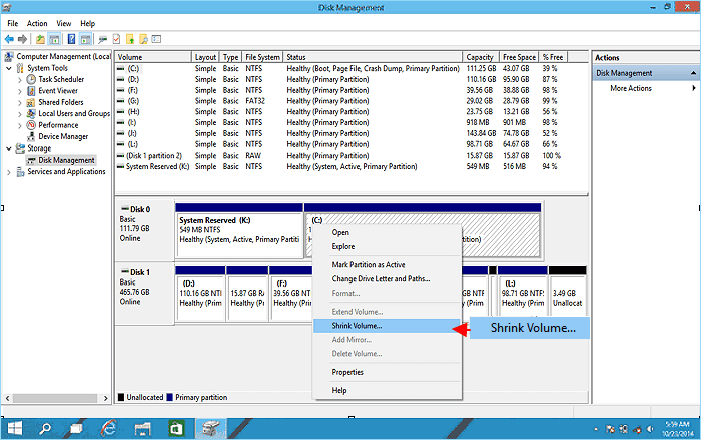
Right-click on the drive from which you need to make a partition and click on ‘Shrink Volume’. Enter the amount of space in MBs and click on the ‘Shrink’ button.
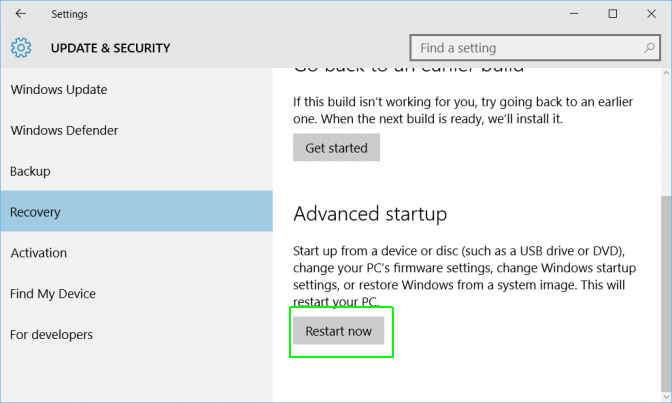
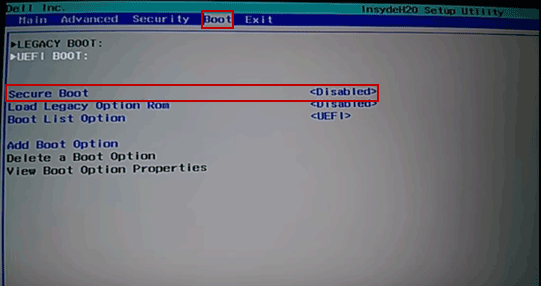
Step 3: Disable the Secure Boot option which is a security feature. To do so, go to Settings → Recovery and under Advanced startup option, click on ‘Restart now’.
This will open up a new screen, from which you need to select ‘Troubleshoot’.
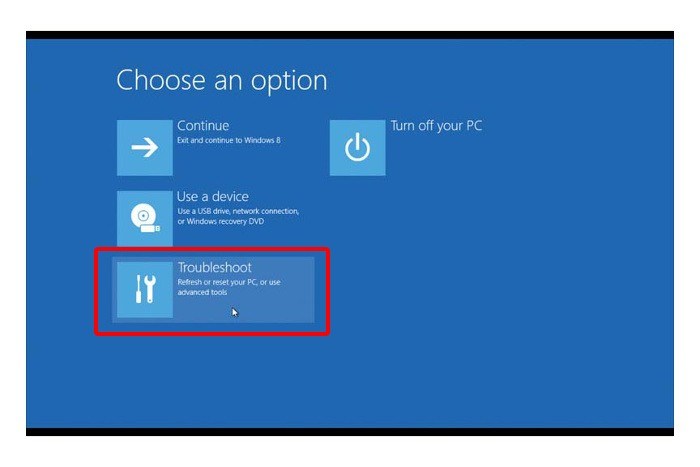
Inside the Troubleshoot menu, select UEFI Firmware Settings and click ‘Restart’. Now, when the PC reboots it will take you to UEFI utility settings from which you can disable secure boot option.
Step 3: After disabling the secure boot, it’s time to boot the system with the bootable USB. To boot from USB, you will have to select boot from USB option within Windows itself. Either with PC Setting (like for UEFI) or pressing the shift key while clicking on Restart.
Step 4: Finally, boot the system with the USB which will bring the options for installing the Ubuntu. You will see a bunch of screens asking for general information like language, personal information, and location.
Make sure to select the option ‘Something else’ when the wizard asks you about the installation type.
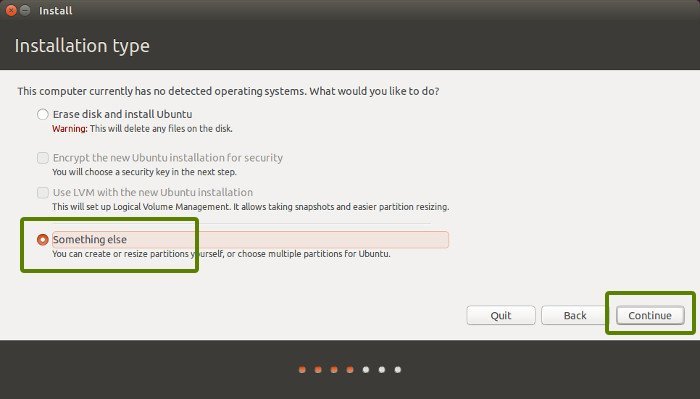
From the next screen, select the space we created in step 2 and click on + sign. You may use the space to create Root, Swap and Home directories.
Once, space is allocated to each directory, click on ‘Install Now’ to complete the process.
Method 3: Installing Ubuntu Using a Virtual Machine
Virtual Machine is an emulation of a standalone operating system within an actual operating system. It acts as a separate machine and does not interfere with the operating system it is hosted on. For example, you can run a full-fledged Linux OS inside your Windows machine using a Virtual Machine.
Ubuntu can be installed using a virtual machine like VMware, Microsoft Hyper-V, VirtualBox, and Citrix XenServer. As I mentioned earlier, it creates an isolated environment that requires memory allocation. Therefore, it is best to have enough resources available in order to run the Ubuntu inside a Virtual Machine.
Step 1: Download and install the virtual machine of your choice. In this tutorial, I will be using VMware which is a popular virtual machine for Windows.
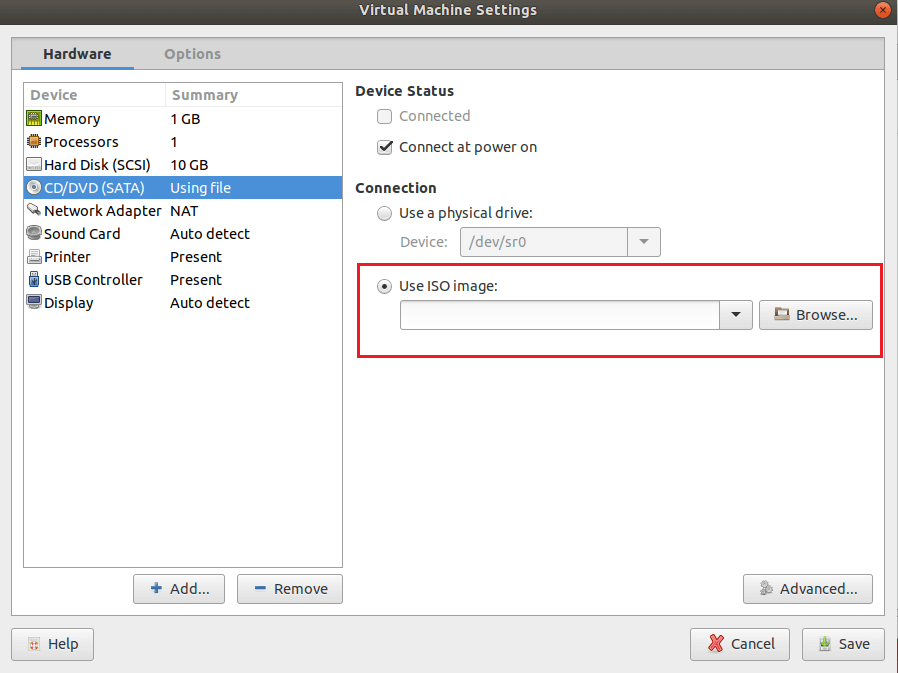
After downloading the VMware, install the virtualization machine. Provide the path to the Ubuntu ISO image.
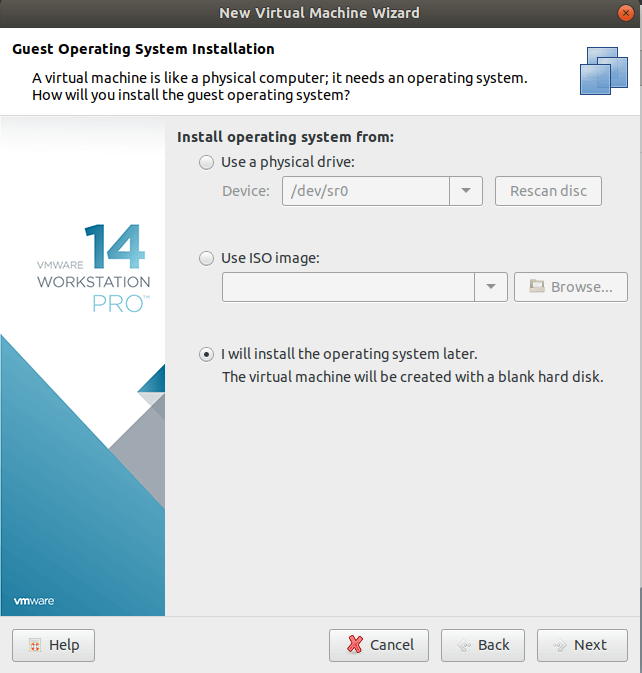
Choose the host operating system (choose Windows if you are on a PC) and allocate the disk size to this VM.

Follow the installation wizard and finish the process to install the virtual machine.
Step 2: Once the virtual machine is installed, it’s time to install the Ubuntu desktop on your guest machine using the ISO image.
Step 3: Once completed, you will see your guest machine boot up with the Ubuntu installation wizard.
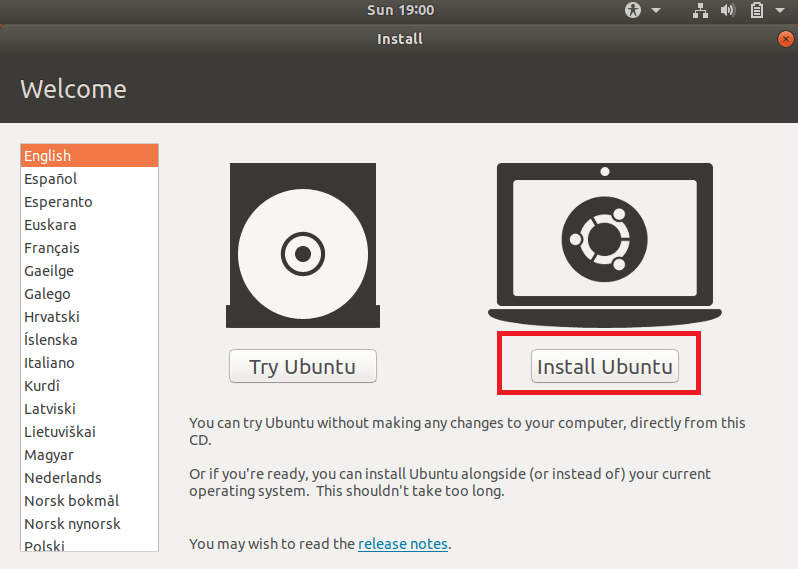
Choose the option ‘Install Ubuntu’, select your language and location and choose the installation type as ‘Erase disk and install ubuntu’. That’s it! Once the installation is completed, you may run the Ubuntu inside your guest operating system.
BONUS Method 1: Play Ubuntu with Live CD / USB
If you are not looking to perform any kind of installation on your system then you can plug and play with Ubuntu. But this method has some limitations. For example, your work will not be saved, there will be permission issues and some applications might not work.
Running Ubuntu from a live CD or a USB thumb drive is easy.
- Create a bootable CD or a USB with Ubuntu ISO image.
- Attach the USB or insert the CD and reboot the computer.
- Upon machine start-up choose the option ‘Try Ubuntu without installing’.
- Once the desktop is loaded, choose the option ‘Try Ubuntu’ from the installation wizard.
That’s it! You can now easily play around with the intuitive interface of Ubuntu OS without switching or sharing your existing operating system.
BONUS Method 2: Online Ubuntu Terminal
One can also experience the Ubuntu OS via an online web interface. There are tons of good online Ubuntu terminals available which let you have hands-on of Ubuntu online.
My personal favorites are:
Exercise
I want you to quickly assess your situation and choose the best option from the methods mentioned in this article. Follow that method and get yourself acquainted with Ubuntu OS as quickly as possible.
It is crucial that you understand Linux based OS to be able to follow the next article in this series. If you get stuck, feel free to comment below and I will be happy to assist.
What’s Next?
In the next article, we will get ourselves familiarized with Ubuntu OS and will also do a bit of coding inside the Linux shell. I will be covering some common Linux commands and will teach you how to use them to perform some basic tasks inside a terminal.